E is for Elephant
- Admin

- Aug 4, 2017
- 3 min read
So this week I kept to my goal of working on just one page at a time. And I decided to give my E is for Elephant page. Last time I wrote about the page it looked like this

Its definitely not my best work. And if I recall, I was probably in a rush when I made it.
The Page
E is for Elephant
Inspiration Pages
from The Quiet Book Blog
Supplies Needed:
Snaps (Or Snap Fastener Pliers and Fasteners)
Needle and Embroidery Thread
Optional: Buttons
Optional: Sewing Machine
Here's How To Do It:
Step 1: Creating the Elephant
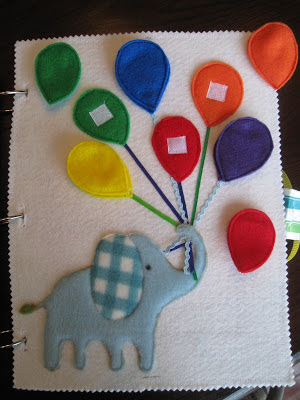
So I think one of my mistakes from the first page was that my elephant was just way to big and i had no room for the shape balloons. So the first thing I did for this second attempt at the page was to find a smaller elephant. So I did another search on Pinterest for Elephant Coloring Pages and after scrolling through all the various elephant coloring pages, I found this little elephant

Image from Crafted Gems
I know its not technically a coloring page, but I love that little elephant and I knew it was the perfect one for my page.
So I printed out the picture and then had to double the size to make the perfect sized elephant for my page. I then asked Blue what color elephant he wanted. First he said pink, but then he changed his mind and decided on a blue elephant with a red eye and ear.
So I cut out a body piece and an ear piece and glued them together. Once the glue was dried, I sewed my elephant to the center bottom of my page.

I also added a small red button for an eye.
(Originally I was going to use a orange red background, but Blue stole the piece, so I settled on the dark green felt. This actually was the perfect color for the background).
Step 2 Creating the Shape Balloons
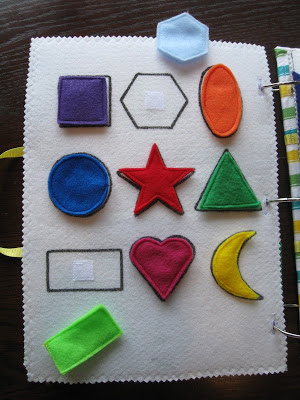
After I had my elephant completed, I moved onto creating the shapes. I'm no artist, so I used google slides to create shape patterns. I simply set my page to a 6 by 6 inch square and then set up a grid inside of that. And then I filled each square with a different shape. I then printed that out and using some scrap felt I cut out two pieces of each shape in different colors.
On one piece of each shape, I sewed a snap in roughly in the center of each. I then sewed the two sides of each shape together.

Once I had all my shapes assembled, I began to play with their placement around the page.

After I finally decided on the perfect layout for my shapes, I carefully traced around each shape and then I back stitched over the traced line. And then I sewed the other half of the snap in the middle of each outline.

As I was back stitching on i really loved how each of the outlines popped against the dark green background!
Step 3 Finishing Touches
To finish up my shape balloons, I used some white yarn and back stitched on some strings. I decided that the front our balloons should be tied to his trunk and the last our should be tied to his tail. (Just so that his trunk wouldn't be so cluttered with strings. I did that for the first page and I don't think it worked.)

To finish the page, I took the E from the original page and stitched it onto this page. And then I back stitch on 'is for Elephant' next to it.
Here's How The Page Turned Out


Comments